
Inventory, bulk editing and asset lifecycle
Create and maintain individual asset records, select a group safely, review bulk changes, and distinguish a move, a checkout and a deletion.
Before you begin
Use an account permitted to edit the relevant inventory. A catalogue model must exist before a new asset can be saved.
Check the result
Reopen the record. Verify the intended change and one value that should have stayed unchanged.
Start with the right record
The inventory register contains individual equipment records. A model describes the product; a serial identifies the physical item; an asset tag records your organization's label. A site or closet describes placement, while a checkout describes custody. Changing one does not establish the others.
Search before creating. Check the existing serial and the Recently deleted list if hardware has returned to service. Discovery, manual entry and spreadsheet import should converge on the same physical record rather than produce a new asset for each way it was entered.
Create or correct an asset
When correcting an existing record, resolve a conflicting serial instead of assigning it to a second asset. The editor checks for concurrent changes; reload and compare another person's saved work before submitting a replacement draft. A successful form submission is not evidence that an external device now reports the same values.
- Open New asset with an account permitted to create records in the relevant inventory area. A catalog model must exist before the form can be submitted.
- Enter the serial and review any match warning. An existing live match offers its record; a deleted match directs you to restoration rather than creating another item with that serial.
- Record the asset tag and name when known. A blank physical tag is displayed as N/A; do not invent a label merely to fill the field.
- Choose the model, status and site or closet. The vendor control narrows model choices. Status affects the available placement choices, so check the destination again after changing status.
- Review the selected model's fields before entering network, funding or other specialized details. If the model lacks the necessary fieldset, the warning explains which information cannot be saved with it.
- Save, reopen the asset and check the recorded values. If a restored draft appears after a session interruption, it is still unsaved until you explicitly save it.
Select the intended rows
Use the row checkboxes to select individual assets. Select an anchor, then Shift-click another row to include the intervening range. Ctrl-click or Command-click a row toggles selection without opening it. A normal row link opens the asset, so distinguish inspecting a record from selecting it for an action.
Before Edit selected, check the count and asset names in the preview. The Delete confirmation shows only the number selected, so check your selection in the list first. Filters, ordering and pagination change the context in which you are choosing records. Do not assume that selecting visible rows means every matching asset in the estate is selected. Bulk editing accepts at most 200 records in one reviewed selection.
Preview a contextual bulk edit
- Choose Edit selected. Leave fields unchanged unless this operation is intended to modify them.
- Choose shared placement, model or funding changes where applicable. Changing the model also changes the category and which custom fields the assets can store.
- Use Add a field for additional supported values. Custom fields appear only when every selected model, or the replacement model you chose, supports them. Split a mixed selection when different models require different changes.
- Enter identifiers separately for each asset. Serial, asset tag, MAC address and supported management-address identifiers are individual values, not a single value to copy across the whole selection.
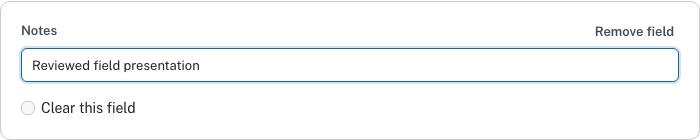
- For eligible ordinary fields, use Clear this field to deliberately erase the value. Leaving the input empty means leave unchanged. Remove field excludes that proposed change.
- Choose Preview changes and read the changing and refused groups. Review the count covered by the confirmation even when the table shows only its first 60 rows. Apply only after the selection and changes match your intention.
- Read the result counts, then revisit the records. Closing the drawer after application starts does not cancel the running operation.
Interpret partial and uncertain results
A bulk operation is not an all-or-nothing promise across the selection. For example, if two assets save and a third fails, retrying must preserve those two results. Reusing the original retry with a different selection or different values is refused; it needs a new preview. Keep the distinction between a known failure and an unanswered save request.
Scroll the table sideways to read all columns.
| Result | What to do |
|---|---|
| Updated | The operation reports a saved change for that record. Check the result and relevant asset details. |
| Already applied | The original request already saved this record. The retry confirms that result without rewriting it or overwriting later changes. |
| Would be refused | Read the reason given. Reasons include permissions, another department's ownership, custody, another editor, a field the model cannot store, no actual change, a closet record, or a record no longer in the inventory. |
| Failed | Some other records may already have saved. Resolve the reported problem, reload and preview the remaining work. |
| Needs review | A saved outcome could not be confirmed for this record. Inspect current data and create a new reviewed preview; do not assume nothing changed. |
| Records changed after your preview | Nothing is applied. Cenovel shows the updated list; review it and confirm again. |
Move equipment or transfer custody deliberately
Use Move to record a new site or closet and an explanatory note. Reopen the record and register to confirm the placement. A supported action may offer Undo; use the actual result and history rather than assuming every later change can be reversed without conflict.
Check out records who or what has the asset. For a person checkout, the confirmation includes acknowledgment that the person has collected it. Do not confirm collection before the physical handoff. A checkout can restrict later editing while the equipment is held in custody. Returning equipment and changing its physical placement are related decisions, but are not interchangeable facts.
Replace a failed unit in place
Use Replace on the asset page of a unit fitted in a switch position, a stack member slot or a part bay. The position keeps its name, management address, ports and links; only the physical unit changes. The unit that leaves keeps its own record and history.
After a replacement, the asset page can ask you to confirm the new unit's identity. Reachability checks after the work wait until someone chooses Confirm identity. If a read finds a different serial in a position without a recorded replacement, the asset page shows A different unit answers here. Choose Confirm replacement to open Replace with the details filled in, or Not a replacement with a reason.
- Choose where the new unit comes from: a spare from storage, or enter or scan its serial and choose its model from the catalog. If a record in storage already has that serial, that record is used.
- Choose what happens to the old unit: Spare in a storeroom, RMA to the vendor or Disposal. It cannot stay deployed. RMA opens a vendor case and puts the unit on the RMA board. Disposing of an E-Rate funded unit needs a reason and your confirmation that its E-Rate disposal rules are met.
- Choose Replace. The result says where the old unit went and what changed. Its open outages close as replaced; that records the swap, not a repair of the old unit.
- A serial already on another live record is refused; one device keeps one record. A serial that belongs to a deleted record is refused too: restore that record if it is the same unit.
- A different model of the same kind needs your confirmation. A different kind of equipment is refused. A unit checked out to someone must be checked in first.
- If the unit changed while the dialog was open, Replace is refused and nothing is changed. Any failure part-way leaves nothing changed.
Delete and restore with the record's history in mind
Deletion removes an asset from the active register and ordinary search. The confirmation identifies the record or selected count. Deleting a single asset gives you ten seconds to cancel. Bulk Delete has no cancel window; recover those records from Recently deleted. Recently deleted keeps an ordinary deleted record restorable for the period set in Settings › Deployment under Data retention (Keep deleted records restorable for; 30 days unless changed), then removes it for good.
A record with recorded funding, an E-Rate plan link or FRN, funding in its change history, or disposal, replacement or RMA history is never removed for good. It can still be deleted and restored at any time. Its Kept column in Recently deleted, and Keep record until on the asset page, give a keep-until date and its basis: for E-Rate equipment, 10 years after the purchase date; for grant-funded equipment, 3 years after disposal; the later date wins. When the date it depends on is not recorded, the record says so and is kept with no end date. Cenovel does not remove a held record when that date passes; the date tells you how long the record must be kept.
Open Recently deleted from the inventory menu, find the exact record and choose Restore when permitted. The server checks the deletion being restored, page permissions and department ownership. If someone restored or deleted it again while your list was open, refresh instead of assuming your stale action succeeded.
Removing network equipment has a separate confirmation and can affect its linked member assets. Review that impact before saving the removal. Discovery reporting a missing component is different: the installation may change while the former asset remains. Disposing of funded equipment also requires its own lifecycle and evidence review; ordinary deletion is not proof of disposal.
Verify one useful result, not just a success message
After a change, check the intended value and one value that should have stayed unchanged. For a notes-only bulk edit, for example, reopen a changed asset, check its note and serial, and confirm an unselected asset was unaffected. For a move, check both the asset drawer and its location in the register.
Record the exact error and affected selection when a workflow stops. A fresh page may show work that committed before the connection failed. Resolve that evidence before repeating an operation that creates, moves or deletes records.
Limits of this guide
- The bulk-edit field list is explicit; it does not promise support for every custom field.
- Storage batch and kiosk work is not yet an available workflow.
- This guide describes the current development release and may include fixes that are not in your installed version.
Reviewed against the current source code. Confirm the behavior and available actions on your installed release.